
Microbit Controlled Eyes
Coding
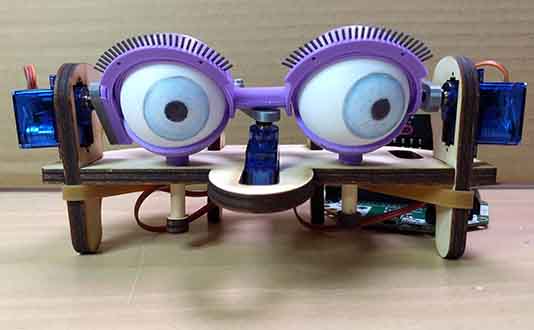
Table of Contents
Coding
Start up the MakeCode editor
We will be coding use MakeCode. We can drag and drop code blocks to build up our program. Nice and easy!
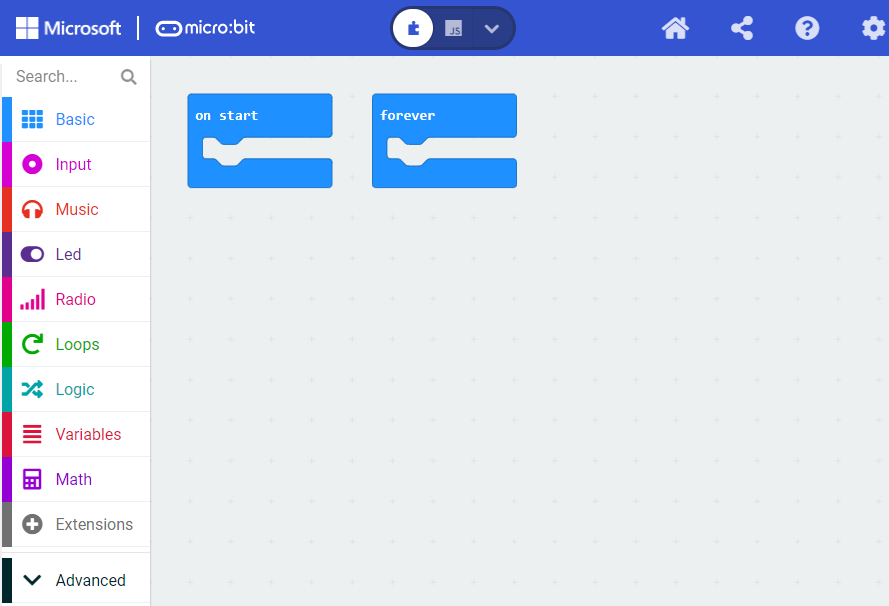
You should see MakeCode open up in a browser window:

Click on the big purple New Project and enter the project name, eyes:
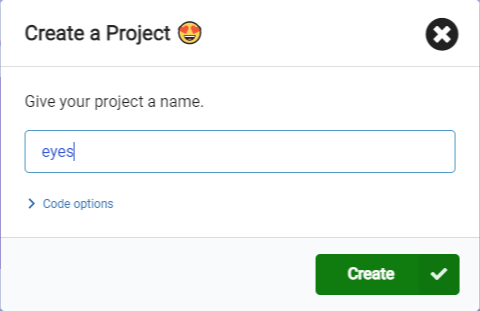
Click the Create button and the code editor will open up:
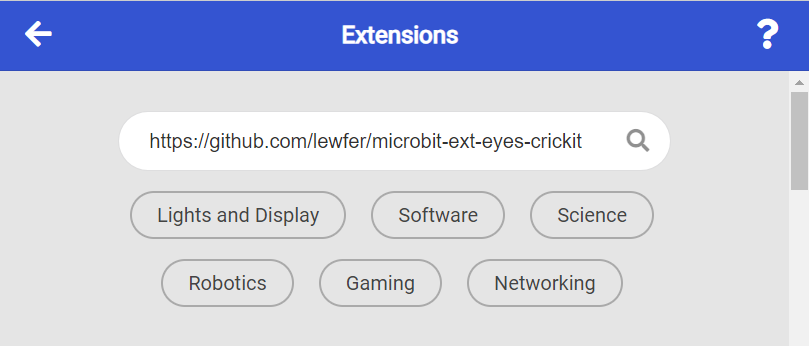
Add the eyes extension
To control the eyes, you will need to add a special code block to Makecode. Click on the Extensions menu:

Then enter the extension URL, which is https://github.com/lewfer/microbit-ext-eyes-crickit:
Hit ENTER and you should see the Mechanical Eyes block:
Click on it and you will see the Eyes tab:

Getting ready to move the eyes
The eyes are controlled by a special type of motor called a servo motor. Standard servo motors can only move 180 degrees. They cannot fully rotate. When you code them, you need to set the angle you want them to move to.

There are 3 motors controlling the eyes:
Servo 1 is the servo motor in the middle of the head, which controls the left-right movement of the eyes.
Servo 2 is the servo motor in the left ear, which controls the up-down movement of the eyes.
Servo 3 is the servo motor in the right ear, which controls the open-close of the eyelids.
In the code, you will be able to set each motor to a value between 20 and 160 degrees. The range is limited to prevent the motors and eyes getting damaged due to over-stretching themselves!
Move the eyes left and right
Let's add some code to make the eyes move left to right.
Find the forever block:
Click on the Crickit menu to the left:
Click and drag the crickit set servo block:
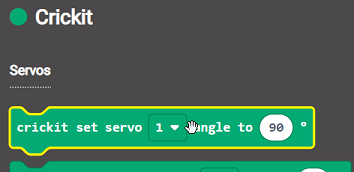
Drag it and drop it into the forever block:
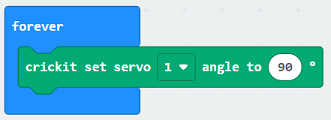
Now we need to set the angle of the servo. We will set it to the left angle:
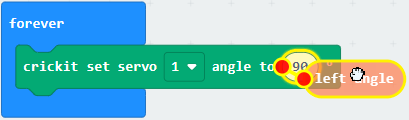
Click on the Eyes tab
Select the left angle block. The tells the eyes to move all the way to the left:

Drag it and drop it into the angle value in the crickit set servo block:
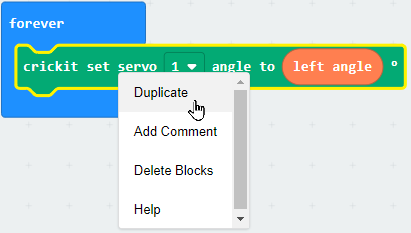
Duplicate the crickit set servo block by right-clicking on it:
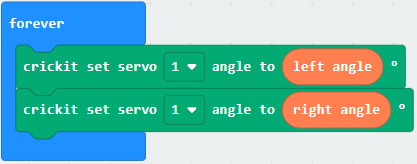
Change the angle to rightAngle. This tells the eyes to move all the way to the right. Once you have done this your forever code should look like this:
We now have code that moves the eyes left and right, but we need to insert a delay so that the eyes have time to move and stay in one position for a little time.
Find the pause block in the Basic menu:

Insert two pause blocks and set the delay to 1 second (1000 milliseconds) so that your code looks like this:
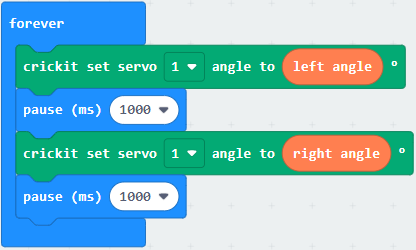
Now download the code to the microbit. The eyes should move left to right, then back again continuously.

Can you see how we could move the eyes up and down?
What about closing and opening the eyelids?
Remote control for eye movement
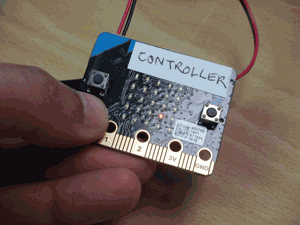
Let's now look at how we can add the remote control for our eyes. The remote control will use the second microbit, to which you need to plug in the battery. Once you do this, you should see a red LED move as you tilt the microbit:

Note: If you are not attending one of our workshops you will need to copy this code onto the controller microbit.
The idea is that we move the eyes in response to the tilting of the controller.
Remove the forever block as we won't need that any more.
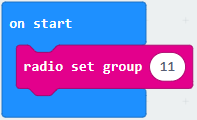
We will use the radio feature of the microbit to send signals from the controller to the microbit controlling the eyes motors.
The controller sends signals on channel 11, so we must set our microbit to listen on the same channel. Add the radio set group block from the Radio menu and set the group to 11:
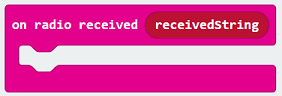
Grab a on radio received block from the Radio menu:
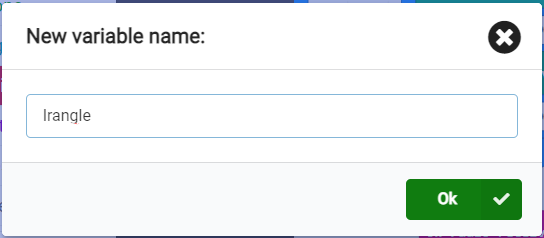
Now build up the code below in the on radio received block. You will need to create two variables, called lrangle and udangle. To do this, go to the variables tab:

Then create the variables, one at a time, by clicking Make a Variable...:
and enter the variable name:
You can find the set block in the Variables menu and the Map block in the Math menu.
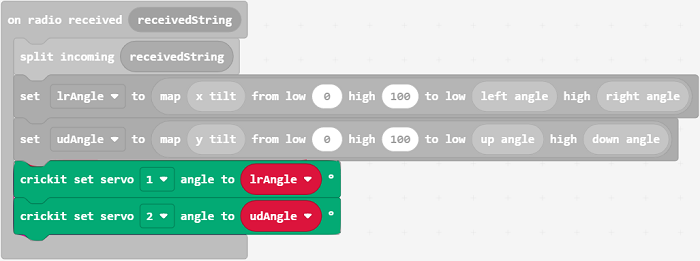
Here is the code you need to create:
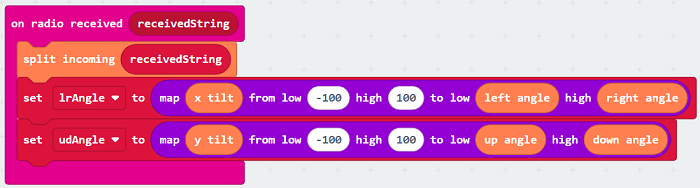
The split incoming in the above code will take the message received from the radio signal and split it into xTilt, yTilt and button values.
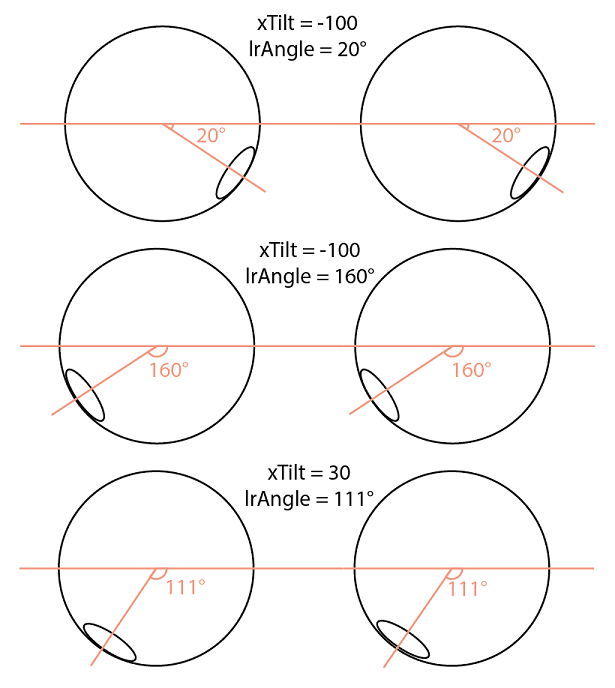
xTilt gives a value between -100 and +100. -100 means the controller was tilted all the way to the left. +100 means the controller was tilted all the way to the right. 0 means the controller was not tilted to the left or right.
yTilt also gives a value between -100 and +100. -100 means the controller was tilted all the way down. +100 means the controller was tilted all the way up. 0 means the controller was not tilted up or down.
button gives a value of A, B or C, telling you if button A or B is pressed. C means both buttons were pressed.
The maps in the above code take the tilt values from -100 to 100 and do a calculation to convert this value into an angle for the appropriate servo motor.

Here's the formula showing how this calculation works.
lrAngle = (xTilt - -100) x (rightAngle- leftAngle) / (100 - -100) + leftAngle
lrAngle = (xTilt - -100) x (160 - 20) / (100 - -100) + 20
lrAngle = (xTilt + 100) x 140 / 200 + 20
Putting in any xTilt value between -100 and +100 will give the correct angle to move the motors to:
lrAngle = (xTilt - -100) x (rightAngle- leftAngle) / (100 - -100) + leftAngle
lrAngle = (xTilt - -100) x (160 - 20) / (100 - -100) + 20
lrAngle = (xTilt + 100) x 140 / 200 + 20
Putting in any xTilt value between -100 and +100 will give the correct angle to move the motors to:
Now add these two crickit set servo blocks. These will take the angles computed by map and use then to turn the motors:
Download the code the to microbit and try out the controller. The eyes should move as you tilt the controller.
Remote control for blinking
Let's now get the eyes to blink. We can use the A button to trigger a blink. Add the following if block code:
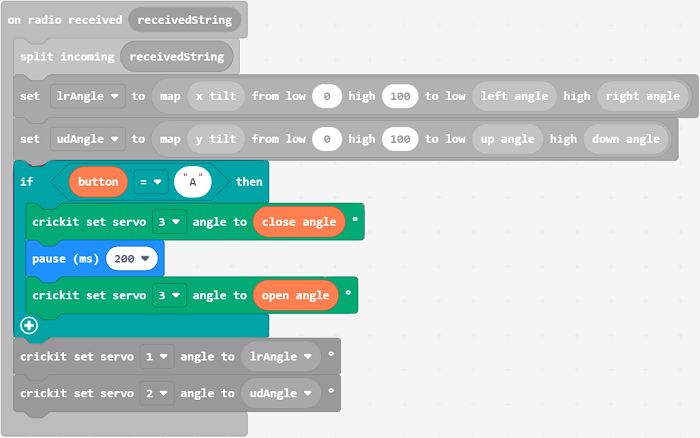
Note that to type in the A you need to first add a text value block, which you can find under the Text menu:
Download the code to the microbit and try the blink function.
Complete code
This is what the complete code should look like if you have followed the above instructions.
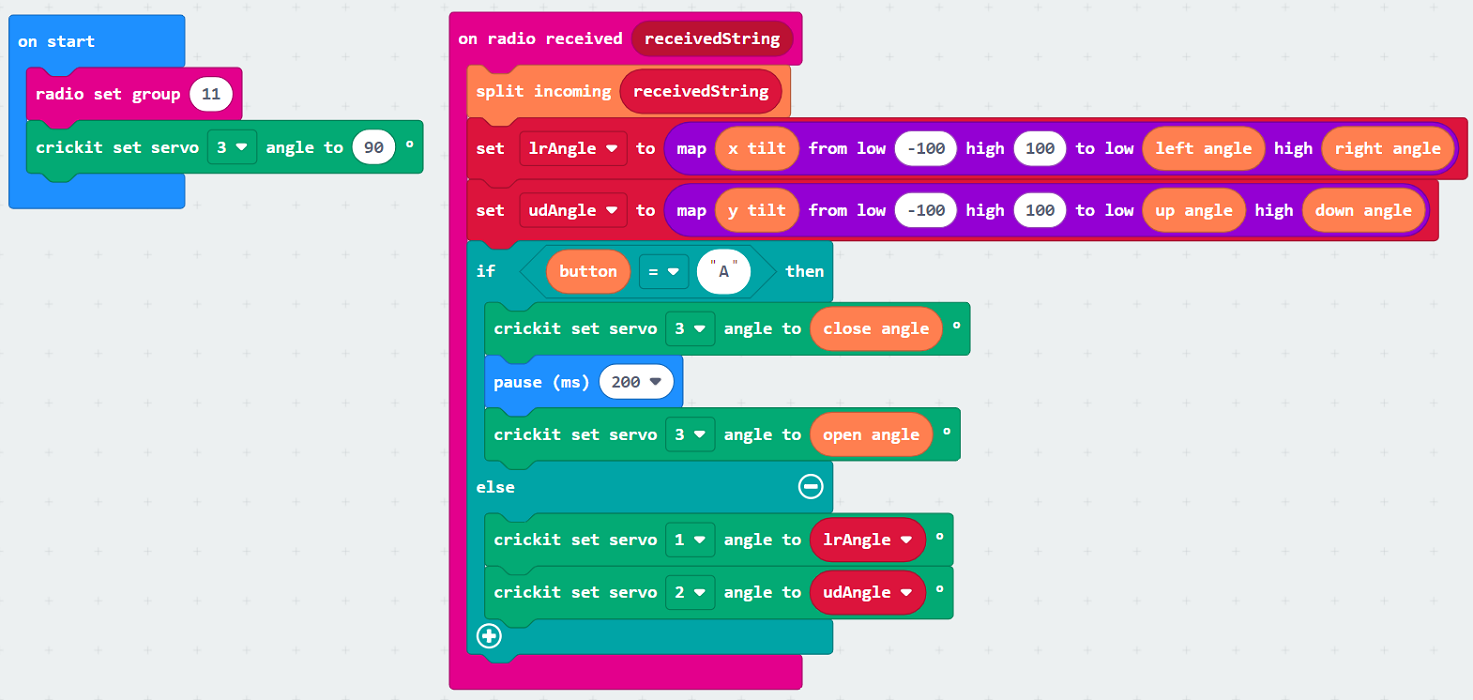
Note: If you want to download the final working code you can do so here and copy it onto the microbit.
Challenges

Use the B button to make eyelids flutter
Use the C button (i.e. the A and B buttons together) to roll the eyes
Use the speaker on the microbit to make sounds as the eyes move
Use the microphone on the microbit to get the eyes to respond to sounds
Troubleshooting
If you have trouble connecting the microbit see here for details.
Table of Contents
©2025 - Think Create Learn Ltd