
Make Interactive Art with Code
Drawing art with code
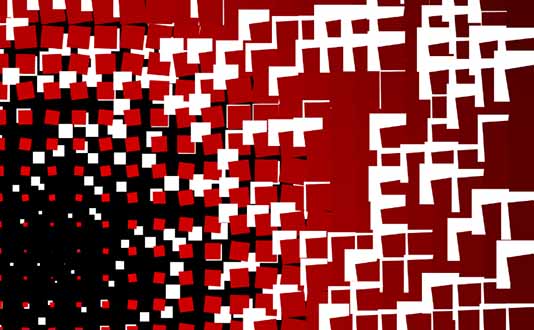
Table of Contents
Drawing Art with Code
Let’s see how we can draw with code. Click on the link below.
Starter codeYou will see the P5 code editor with the following code:
Duplicate the code:
Then change the name:
Click the run button to run the code:

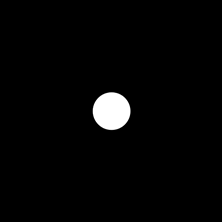
You should a white circle in a black background:
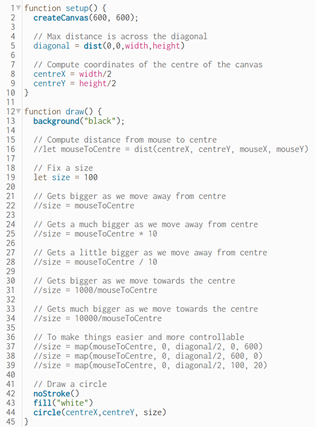
Understand the code: sketch.js
Take a look at the description of the code below:
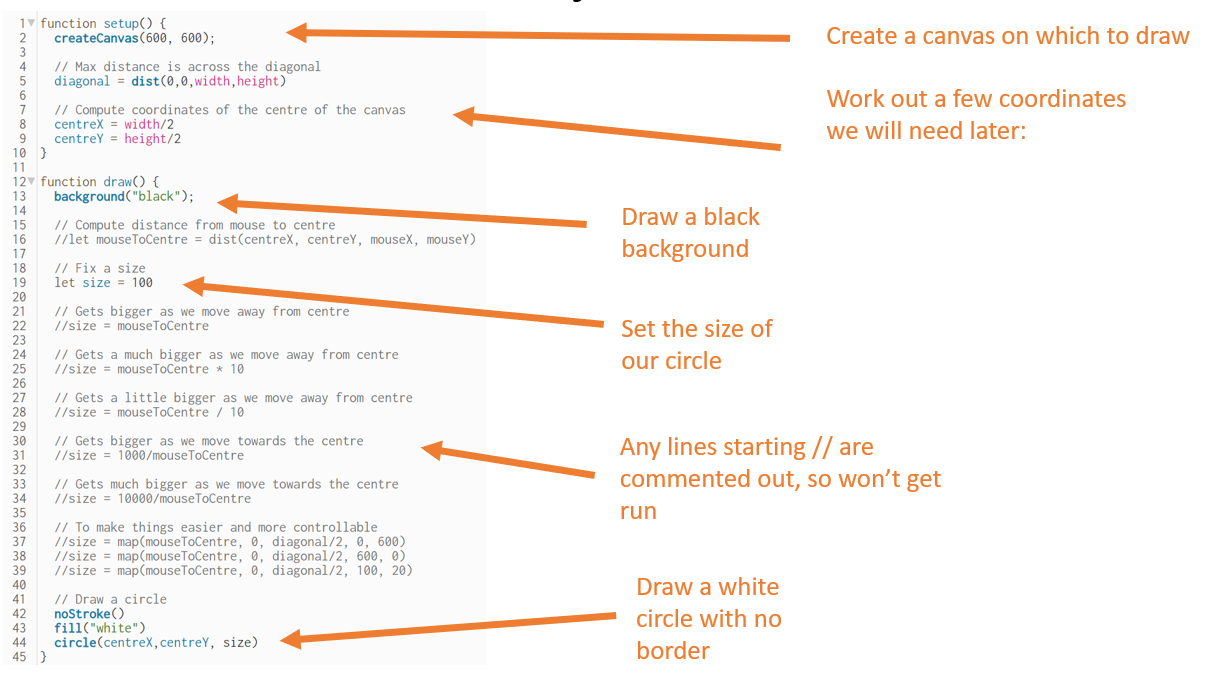
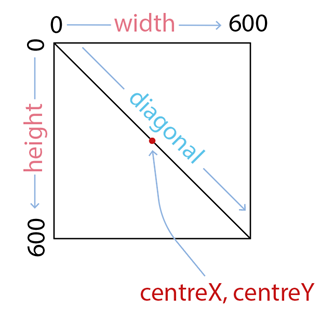
Note how the coordinate system works, with coordinate 0,0 at the top left and 600,600 at the bottom right. We calcuate centreX and centreY to indicate the centre of the canvas.
Changing the size of the circle with the mouse
At the moment our circle is fixed in size. Let’s now make the size of the circle respond to the mouse movement.
Comment out and uncomment lines as shown below:

Run the code. The circle should get bigger as we move away from the centre.
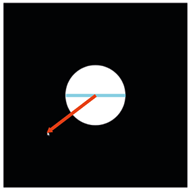
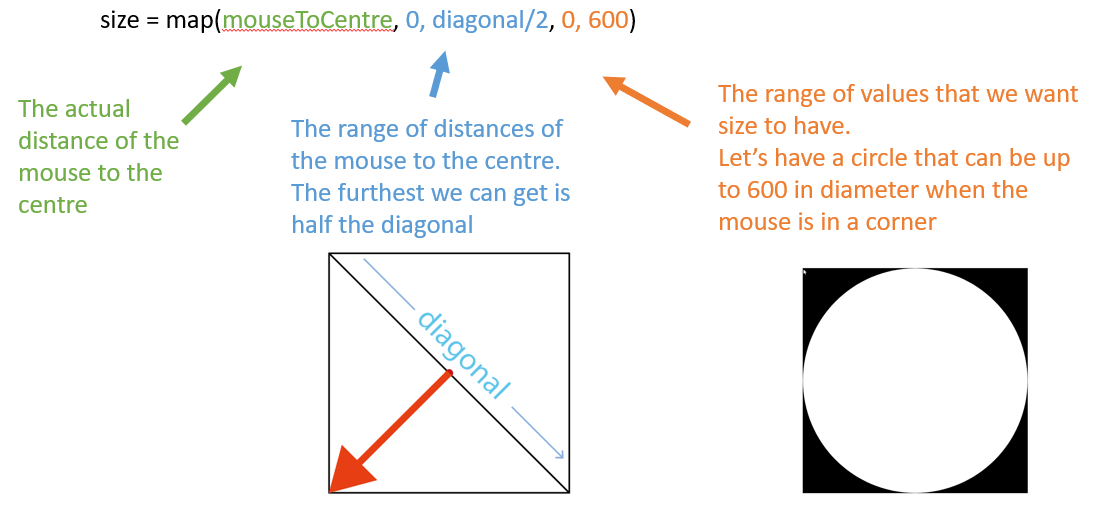
How does this work? Take a look at the picture below. We measure the distance from the mouse to the centre of the canvas (red arrow) and draw a circle using that distance as the size (blue line). So in the picture the red and blue lines are the same length:
Now make the following changes. If we multiply the distance by some value (e.g. 10), we get a circle that gets much bigger as we move the mouse:

Run the code. The rate at which the circle gets bigger has increased.
Now try the following changes. If instead we divide by a value, we get a circle that only gets a little smaller as we move the mouse:

Reversing the change in size
What if we want the circle to get smaller as we move away from the centre, rather than bigger?
Uncomment the following line and run the code:

Then try this and run the code again:

Can you see that the circle gets smaller as you move the mouse away from the centre?
How the calculations work
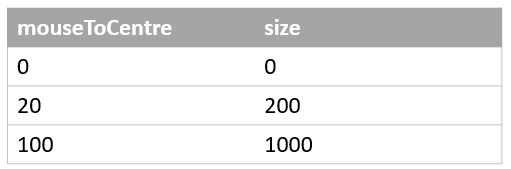
In the previous examples, when we do these little calculations, we are mapping the distance of the mouse to the centre of the canvas to a circle size. For example, when we have this line:
size = mouseToCentre * 10
the values will change like this:
Making the calculations simpler to use
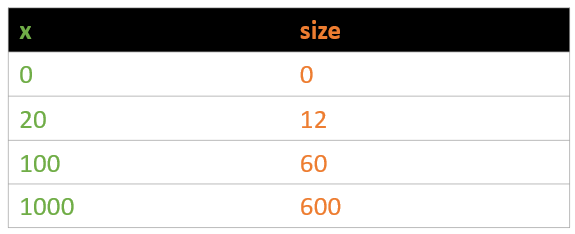
P5 provides a function called map which provides a consistent way to convert from one number range to another. If we had code like this:
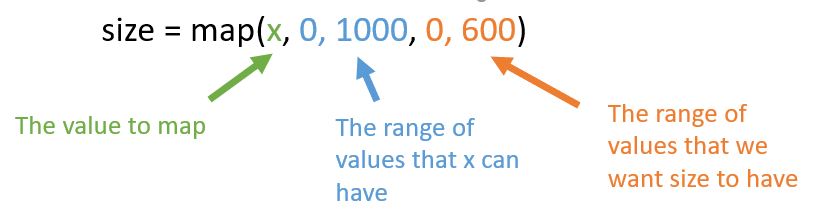
the values will change like this:
Let’s try a mapping
Uncomment this line:
Run the code and see the effect.

Now try out some of these different mappings:

Repeating shapes
We now know how to control a single circle. But it’s not quite art yet! Let’s create a whole canvas of circles. I'll show you some examples and then you can have a go yourself.
You can find the code here:
Repeating shapes codeLet's start by drawing 3 circles:
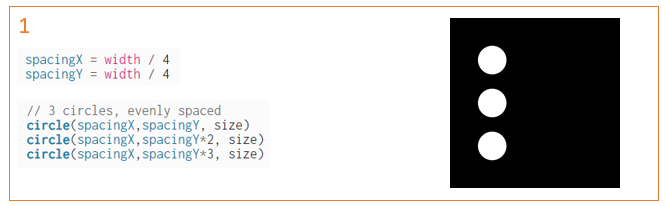

Can you see how the spacing is working?
Now let's draw a grid of 9 circles:
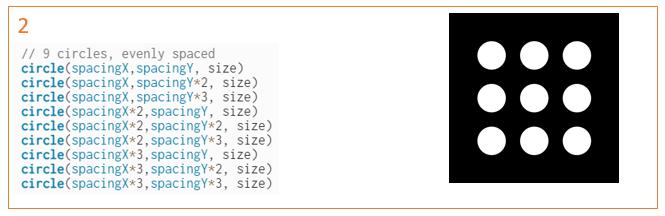
The code is a bit more complicated. Can you see a better way to write this code?
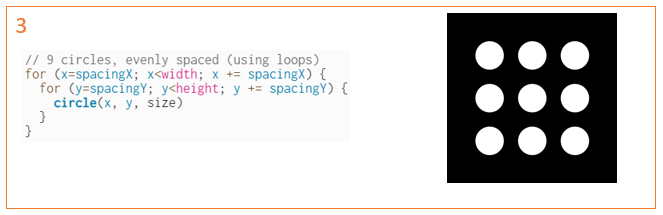
A better way to write this code is to use loops:
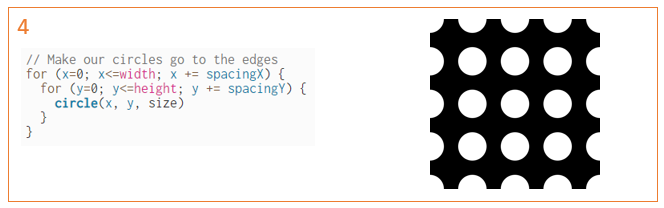
We can make a small adjustment to make our circles go all the way to the edges:
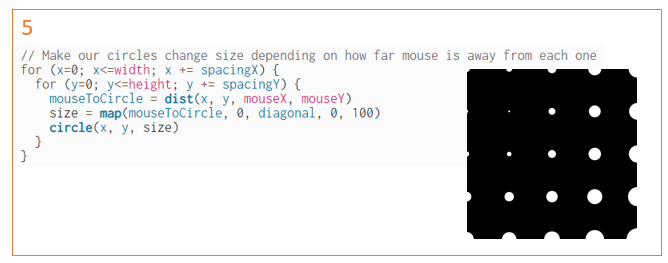
Now let's add some interactivity. Making this change will cause the circles to change size depending on where the mouse is.
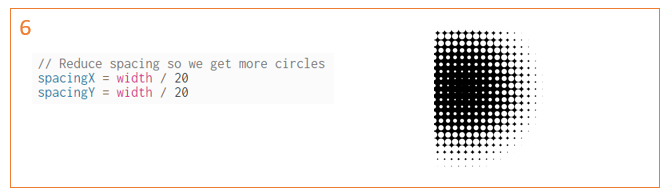
We can also play with the spacing so we get more or fewer circles:
Repeating shapes – Your turn!
Open up this sketch and duplicate it:
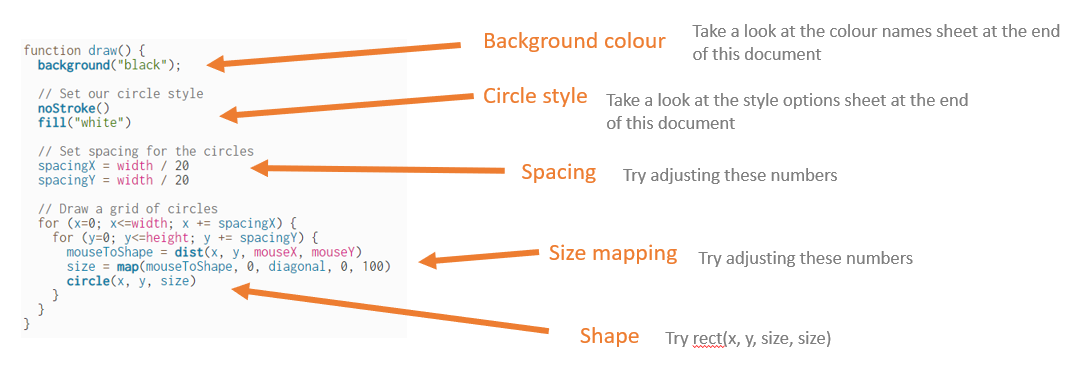
Repeating shapes codeTry changing the code, as indicated in the following picture
Wobble and Randomness
To make our art more interesting, let’s add some wobble and randomness!
Open up this sketch and duplicate it:
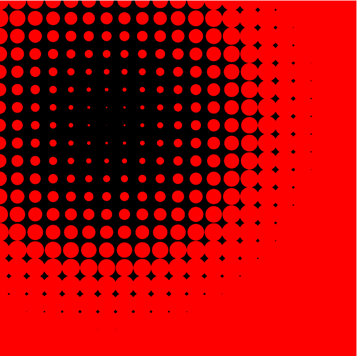
Wobble codeRun the code. You should see some red circles on a black background:
Adding wobble
Wobble is a small number we can add to the position of the shape so that it is slightly offset:

Wobble is currently set to 0. Try uncommenting some of the other lines of code to see what effect they have:
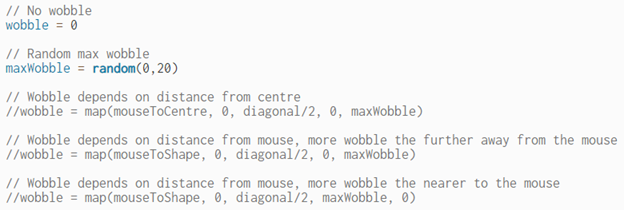
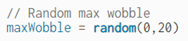
Try changing the numbers in the random function:
Adjusting Colours
We can also change the colours as we move the mouse
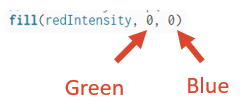
Find this section of code
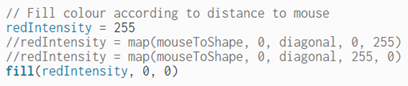
Try uncommenting the other lines, one at a time, and see what effect they have
Can you change the blue and green intensity too?
If you change all 3 you might even get a rainbow of colours!
Try a Wobbly Square
Comment out the wobbly circle and uncomment the wobbly rectangle:
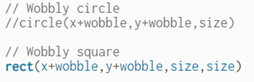
Run the code.
Try Rotated Wobble
So far we have been using wobble to shift the position of the shape.
But we can also do other things, such as rotating a shape.
Comment out the wobbly circle and wobbly square and uncomment the rotate wobble code:
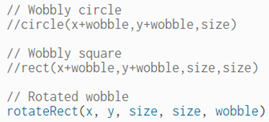

Note: The rotateRect() function can be found at the bottom of the sketch.
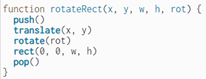
translate() moves the position of 0,0 from the top left of the canvas to x,y. This is needed because rotate() will always rotate around 0,0.
The push() and pop() just save and restore our settings, so the translate() and rotate() only apply to the one rectangle at a time.
Play around with the amount of wobble and see what effects you can get
Table of Contents
©2025 - Think Create Learn Ltd