
Microbit Crawling Robot Activity
Coding

Table of Contents
Coding
Start up the MakeCode editor
We will be coding use MakeCode. We can drag and drop code blocks to build up our program. Nice and easy!
Start MakeCode by clicking here.
If you want a head-start, use this version that has the on start code already done:
Start MakeCode by clicking here.
You should see the starter code open up in a browser window:
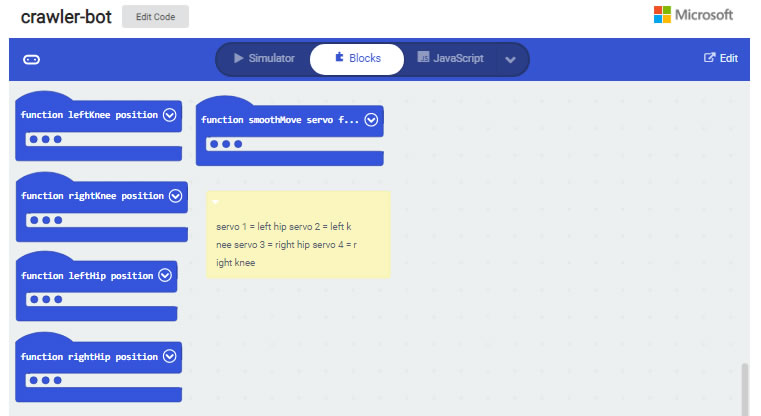
Click on the Edit button in the top right and the code editor will open up:
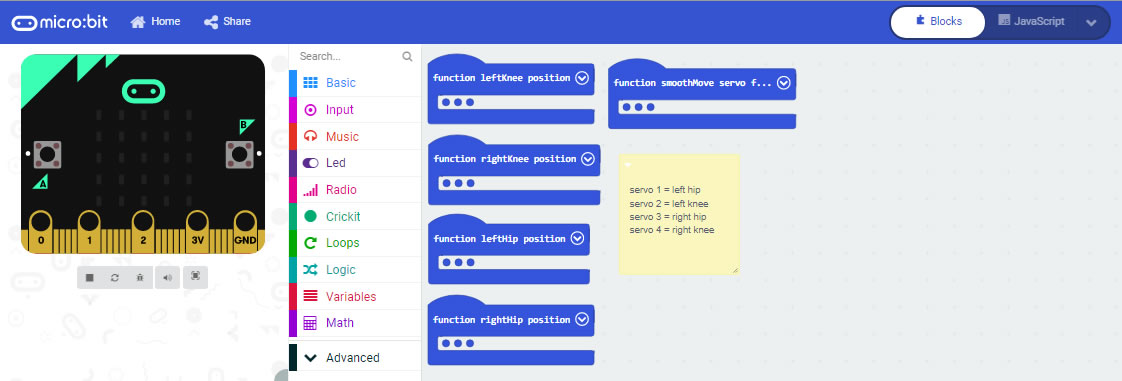
Take a look at the code
You will see a group of functions. These are already written for you. You don't need to touch these. These functions control the servo motors.

Add two code blocks, on start and forever. You can find these in the Basic tab on the left. These code blocks are where you will enter your code to call the functions to move the servos.

Set the initial servo angles
Standard servo motors can move 180 degrees. They cannot fully rotate. When you code them, you need to set the angle you want them to move to.
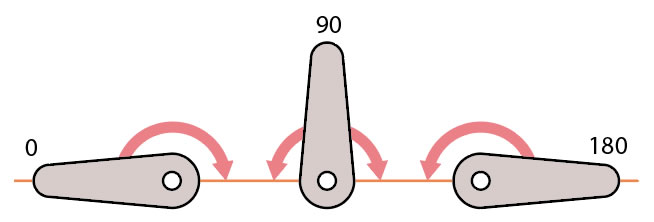
Let's set the intial angle for all servos to 90 degrees. This will be their "neutral" position. Once we have set the servos to their neutral position we can check that the legs of the robot are in the correct position!
Click on the Variables tab:

Select the set block (note that the name of the variable may be different to that shown):

Drop the set block into the on start block and set the variable name to currentLeftHipAngle and the value to 90:
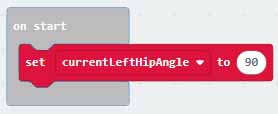
Duplicate the set block 3 more times:
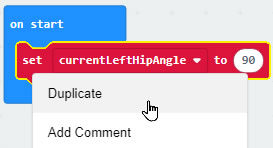
and set the other 3 servo angles as follows:
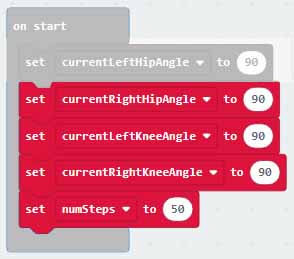
Note the set numSteps is set to 50. This tells the functions that drive the servos to move the servos in 50 steps, which gives a nice smooth movement.
Now we need to actually move the servos. For this we need to make function calls. The call blocks can be found in the Functions tab under Advanced:

Set up the following code in the on start block:
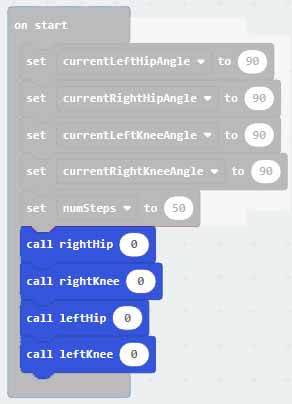
The 0 values tell the servos to now move to their default position (90 degrees).
Upload the code to the Microbit
Now we can upload this code to the Microbit to set the initial servo angles.
Plug the big end of USB cable into your computer:
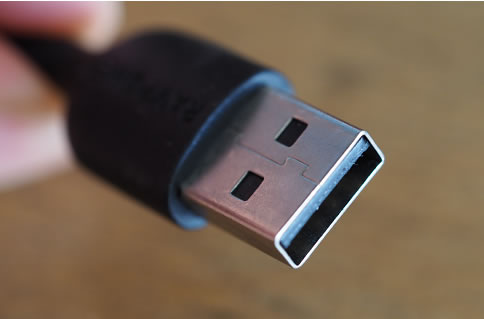
Then plug the small end into the Microbit:
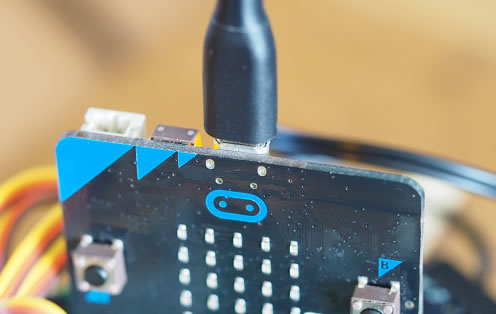
You should see a Microbit drive appear on your computer (which will look different if you are on a Mac or Windows PC):


Then click the Download button in the Makecode editor:

Drag the file that is downloaded (which should be called something like microbit-crawler-bot.hex) and drop it on the MICROBIT drive that should appear on your computer. If you do this right, the yellow light on the Microbit should start flashing. When this is done, the servos should move to their default positions.
Check the position of the legs
Warning! Try not to turn the servo motors with your hands. You can easily damage them.
Now check that the legs are in the correct position. First, check the hips. View the robot from the top and check that the hips are at right angles to the servo. These servos should be correct as they were calibrated for you with the kit.
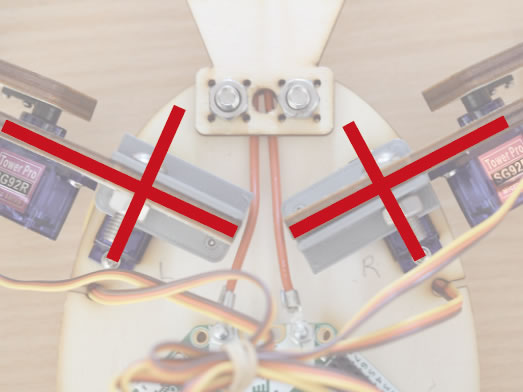
Then place the robot on a table and view the robot from the front. The knees should be straight and touching the table:
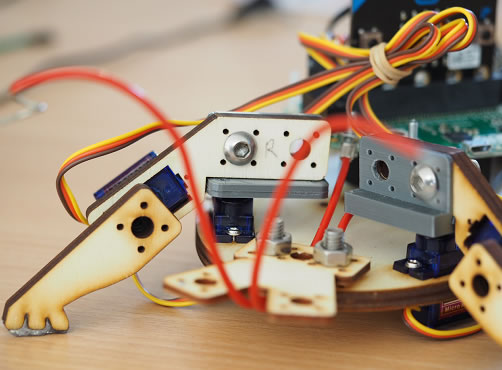
If the feet are not straight and touching the table, remove them and adjust their position.
Make the right hip move
Now let's make the right leg move. In the existing forever block, add the following code:
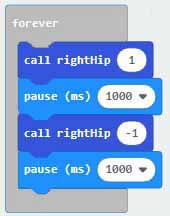
Download the code and copy it onto the Microbit again. The right hip should move back and forwards.
The numbers in the call to the rightHip function determine the position of the servo motor. In the code above, position 1 is forward, position -1 is backward and position 0 is the neutral position.
Make the left hip move
Now add code to make the left hip move. Add this to the same forever loop.
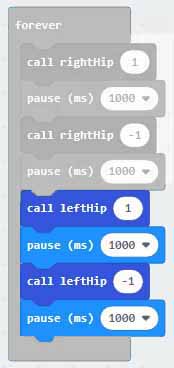
Download the code and copy it onto the Microbit again.
Make the knees move
To make the knees move, you can use the call rightKnee and call leftKnee blocks:


The values passed to the functions are 1 for up, -1 for down and 0 for the neutral position.
Once you have done the right knee, try the left knee
How did you get on? There are many ways to sequence the leg movements, but here is one way you could use (note the code is all in the same forever block):

Sensing the antenna
The antennae are connected to the capacitative touch sensor inputs on the Crickit board. This means they are sensitive to touch. We just need to write some code!
Locate the Crickit tab on the left:

You will see the Touch code block:

You will also see the NeoPixel code block:

Use these blocks to write some code to change the colour of the neopixel light on the Crickit board when the antennae are touched. Create a new forever block (you can find it in the Basic tab) and add the following code:
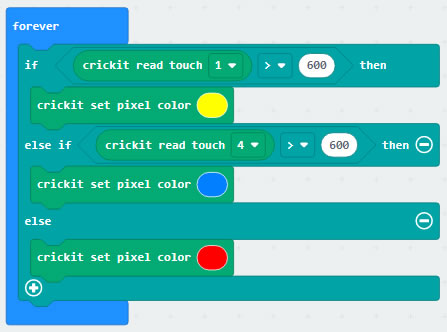
Let's call this the sensor forever block (to distinguish it from the motor forever block we created at the start). Note that we are using touch sensors 1 for the right antenna and 4 for the left antenna.
Upload the code to the Microbit. Touch the antennae. You should see the neopixel change colour. If it doesn't change, you may need to change the sensitivity. Change the value 600 to some other value. Something between 400 and 800 should work. You may need to experiment.
Changing direction when the antenna is touched
We can get our bot to behave like a real creature when it is touched. You can get it to move taway from the side being touched. To do this we need to connect the antenna sensing code with the movement code. We will create two new variables called rightMovement and leftMovement. These control whether the left and right side legs move or not.
Make the new variables

Then set them both to 1 in the on start:
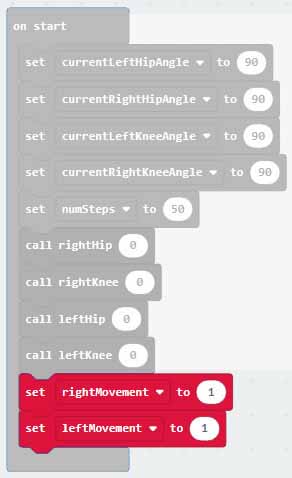
Make another variable called touched. This will indicate whether the antennae were touched and also count how long the robot will move away from the touched side. Change the sensor forever block to set the new variables as follows:
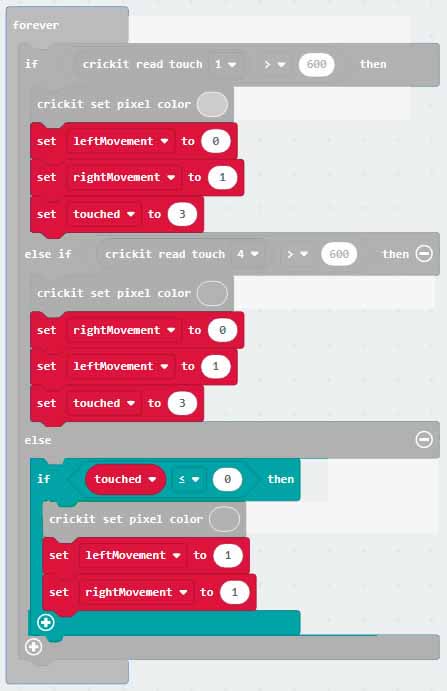
This code sets rightMovement on and leftMovement off when the right antenna is touched, and does the opposite when the left antenna is touched. The touched variable indicates that an antenna is touched and is set to a count.
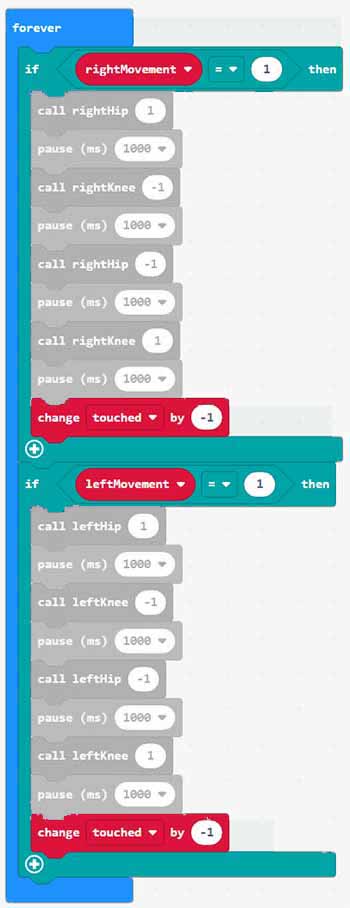
Now, change the motor forever block so that the left and right legs are only moved if the leftMovement and rightMovement variables indicate they should. We also reduce the touched count by 1 each time a leg moves so that eventually both legs will start moving again.
When you have finished coding, your code should look like this, with one on start block and two forever blocks:
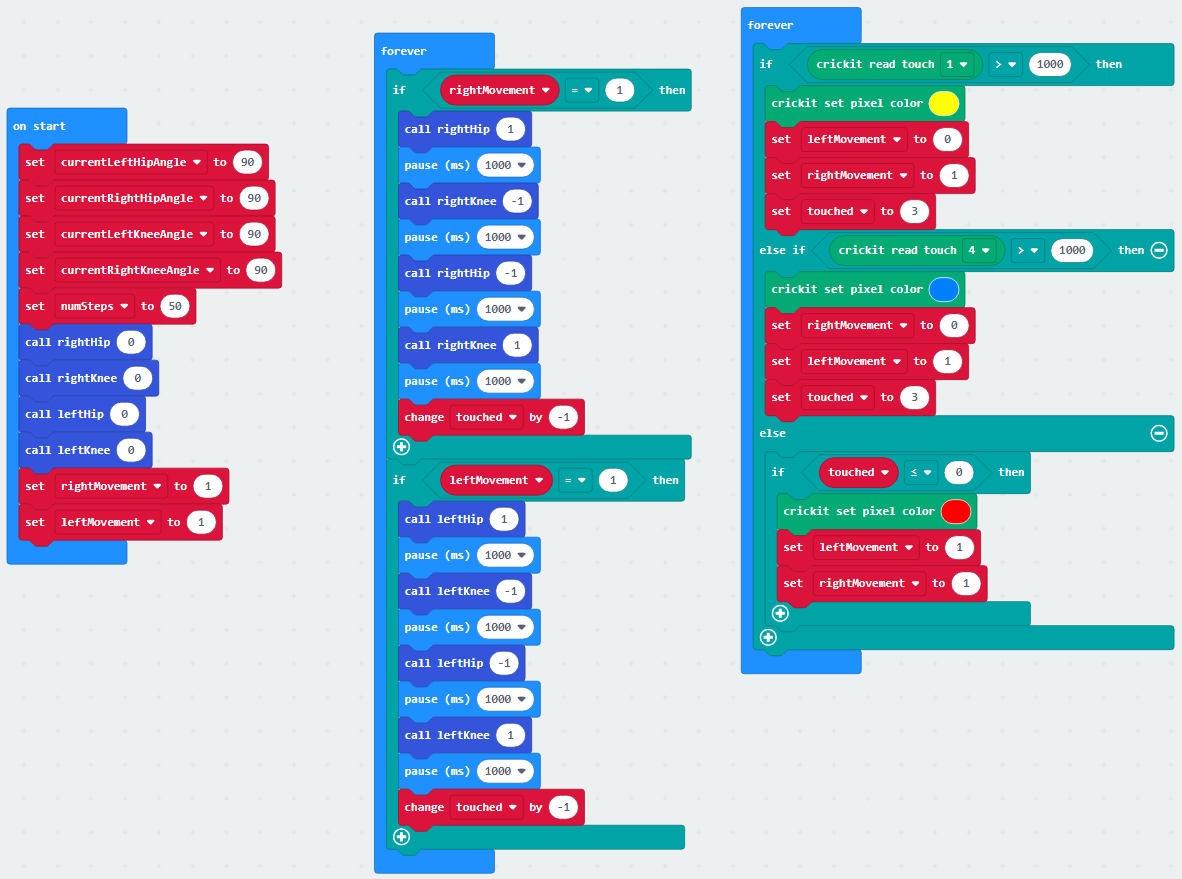
Upload the code to the Microbit again. Your robot should now respond when the antennae are touched.
Challenges!
If you complete the above, why not give the following a try. I won't provide the solutions because it's good to challenge yourself. The struggle will help you learn!
You could use a variable to set the value once and use it in all the pause blocks. This way, when you want to change the speed you just need to change one code block.
Troubleshooting
If you have trouble connecting the microbit see here for details.
Table of Contents

