
Microbit Crawling Robot Activity
Make the kit
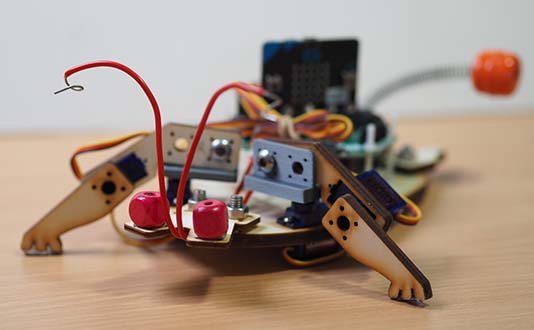
Table of Contents
Make the Kit
If you want to make your own version of the kit, read on.
The electronic components can all be purchased easily, but the body needs some components to be made. I've used a laser cutter to cut out the wooden parts, and 3D printed a couple of adapters to make the hip joints. You can improvise!
But for those of you who have access to the right equipment, I'll share my models here:
Laser cutter file for wooden body
I cut these in 6mm poplar. Cut the red lines first, then the black lines.
Laser cutter file for the head and back legs
I cut these in 3mm poplar. Again, cut the red lines first, then the black lines.
3D printer file for hip joints
These work with the Tower Pro servo motors I use and my Prusa Mark III printer. I've built supports into the design. Just break the holes out afterwards (or carefully drill them out with a 6mm drill bit, making sure you clamp the piece securely).
Purchasing the electronics
I recommend PiHut or Pimoroni or Kitronik for purchasing electronics for digital making. Here are some links for the parts from PiHut:
Microbit
Adafruit Crickit (the Microbit one)
Battery holder with 2.1mm plug
4x TowerPro SG92 Servo motors
USB cable
Purchasing the fastenings
You can improvise with fastenings, but here are some links where you can buy them.
M6 20mm bolts
M6 nuts
M3 plastic bolts
M3 plastic nuts
M3 10mm bolts
M3 nut
For tiny screws which can be used to connect servo horns to wood, I recommend Model Fixings. The MF-ST63s are perfect for this purpose.
Need help?
Feel free to email me
Table of Contents
©2025 - Think Create Learn Ltd